Animated Custom Slider using HTML, CSS and JS
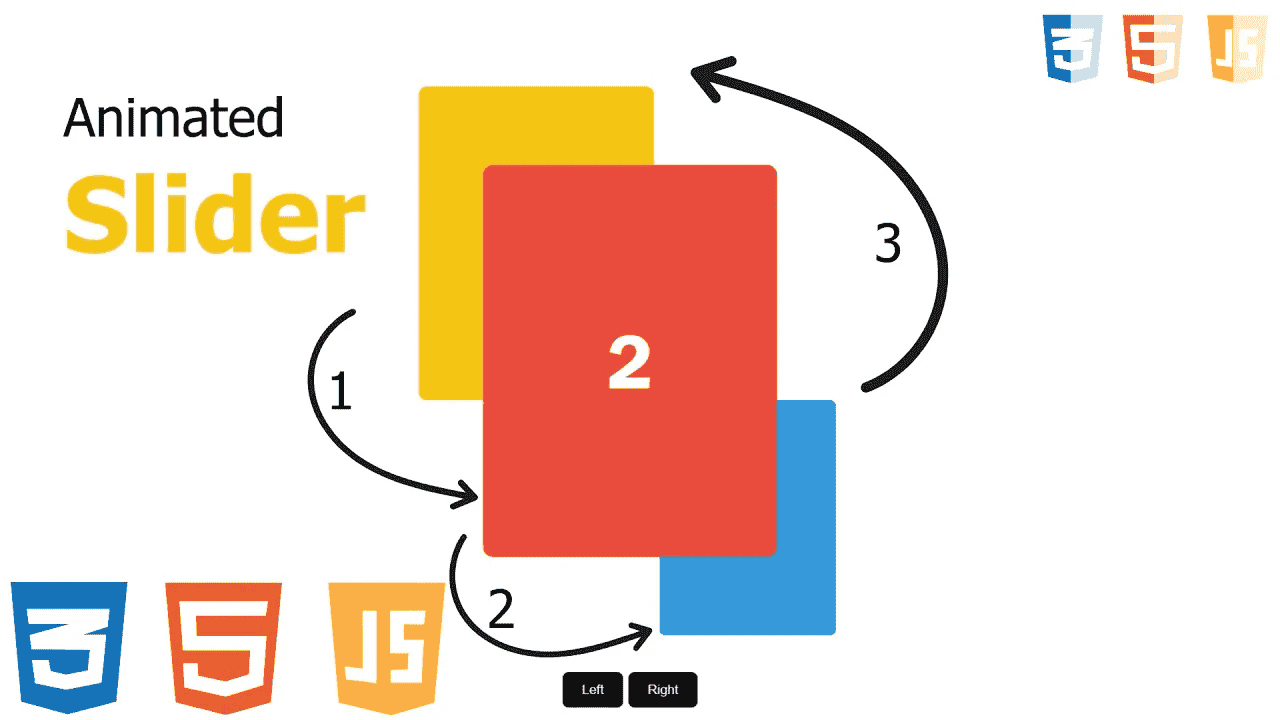
Are you ready to take your web development skills up a notch? In this exciting tutorial, we'll guide you through the process of creating a stunning animated custom slider from scratch using HTML, CSS, and JavaScript. Sliders are not only visually appealing but also a great way to showcase content in an interactive and engaging manner.
Follow these steps to get cool looking slider. Let's deep dive in:
HTML
First, we need to create a container for our slider. Inside this container, we will create a div for each slide.
html<div class="container"> <div class="slide left-slide slide1">1</div> <div class="slide center-slide slide2">2</div> <div class="slide right-slide slide3">3</div> </div> <div class="buttons"> <button onclick="moveLeft()">Left</button> <button onclick="moveRight()">Right</button> </div>
We also need to create two buttons for moving the slides left and right.
CSS
Next, we need to style our slider. We will use CSS Grid to create a grid layout for our slider. We will also use CSS variables to store the width of each slide.
css* { margin: 0; padding: 0; box-sizing: border-box; } body { width: 100%; height: 100vh; display: flex; align-items: center; justify-content: center; } .container { position: relative; width: 300px; height: 400px; border-radius: 10px; } .slide { position: absolute; width: 100%; height: 100%; border-radius: 10px; transform: translate(-50%, -50%); display: flex; align-items: center; justify-content: center; font-size: 80px; color: white; font-family: 'Franklin Gothic Medium', 'Arial Narrow', Arial, sans-serif; } .slide1 { background-color: #f1c40f; } .slide2 { background-color: #e74c3c; } .slide3 { background-color: #3498db; } .left-slide { left: 8%; top: 10%; z-index: 20; scale: 0.8; } .center-slide { left: 50%; top: 50%; z-index: 30; scale: 1; } .right-slide { left: 70%; top: 70%; z-index: 20; scale: 0.6; } .buttons { position: absolute; bottom: 20px; display: flex; align-items: center; justify-content: center; gap: 5px; } button { background-color: black; color: white; padding: 10px 20px; border-radius: 6px; border: none; outline: none; }
JavaScript
We will change the properties of the slides by changing their classes (left-slide, center-slide, right-slide) using JavaScript.
js<script> const slides = document.querySelectorAll('.slide'); function moveLeft() { slides.forEach((slide) => { if (slide.classList.contains("left-slide")) { slide.classList.replace("left-slide", "right-slide"); slide.style.transition = 'all 0.4s ease-in-out'; } else if (slide.classList.contains("center-slide")) { slide.classList.replace("center-slide", "left-slide"); slide.style.transition = 'all 0.3s ease-in-out'; } else if (slide.classList.contains("right-slide")) { slide.classList.replace("right-slide", "center-slide"); slide.style.transition = 'all 0.2s ease-in-out'; } }); } function moveRight() { slides.forEach((slide) => { if (slide.classList.contains("left-slide")) { slide.classList.replace("left-slide", "center-slide"); slide.style.transition = 'all 0.2s ease-in-out'; } else if (slide.classList.contains("center-slide")) { slide.classList.replace("center-slide", "right-slide"); slide.style.transition = 'all 0.3s ease-in-out'; } else if (slide.classList.contains("right-slide")) { slide.classList.replace("right-slide", "left-slide"); slide.style.transition = 'all 0.4s ease-in-out'; } }); } </script>
Conclusion
Conclusion! We made an animated custom slider, you can use it in your website. It is looking cool.
Follow and Support me on Medium and Patreon. Clap and Comment on Medium Posts if you find this helpful for you. Thanks for reading it!!!


