Enhancing Three.js Scene with Helpers (Beginner Guide 04)
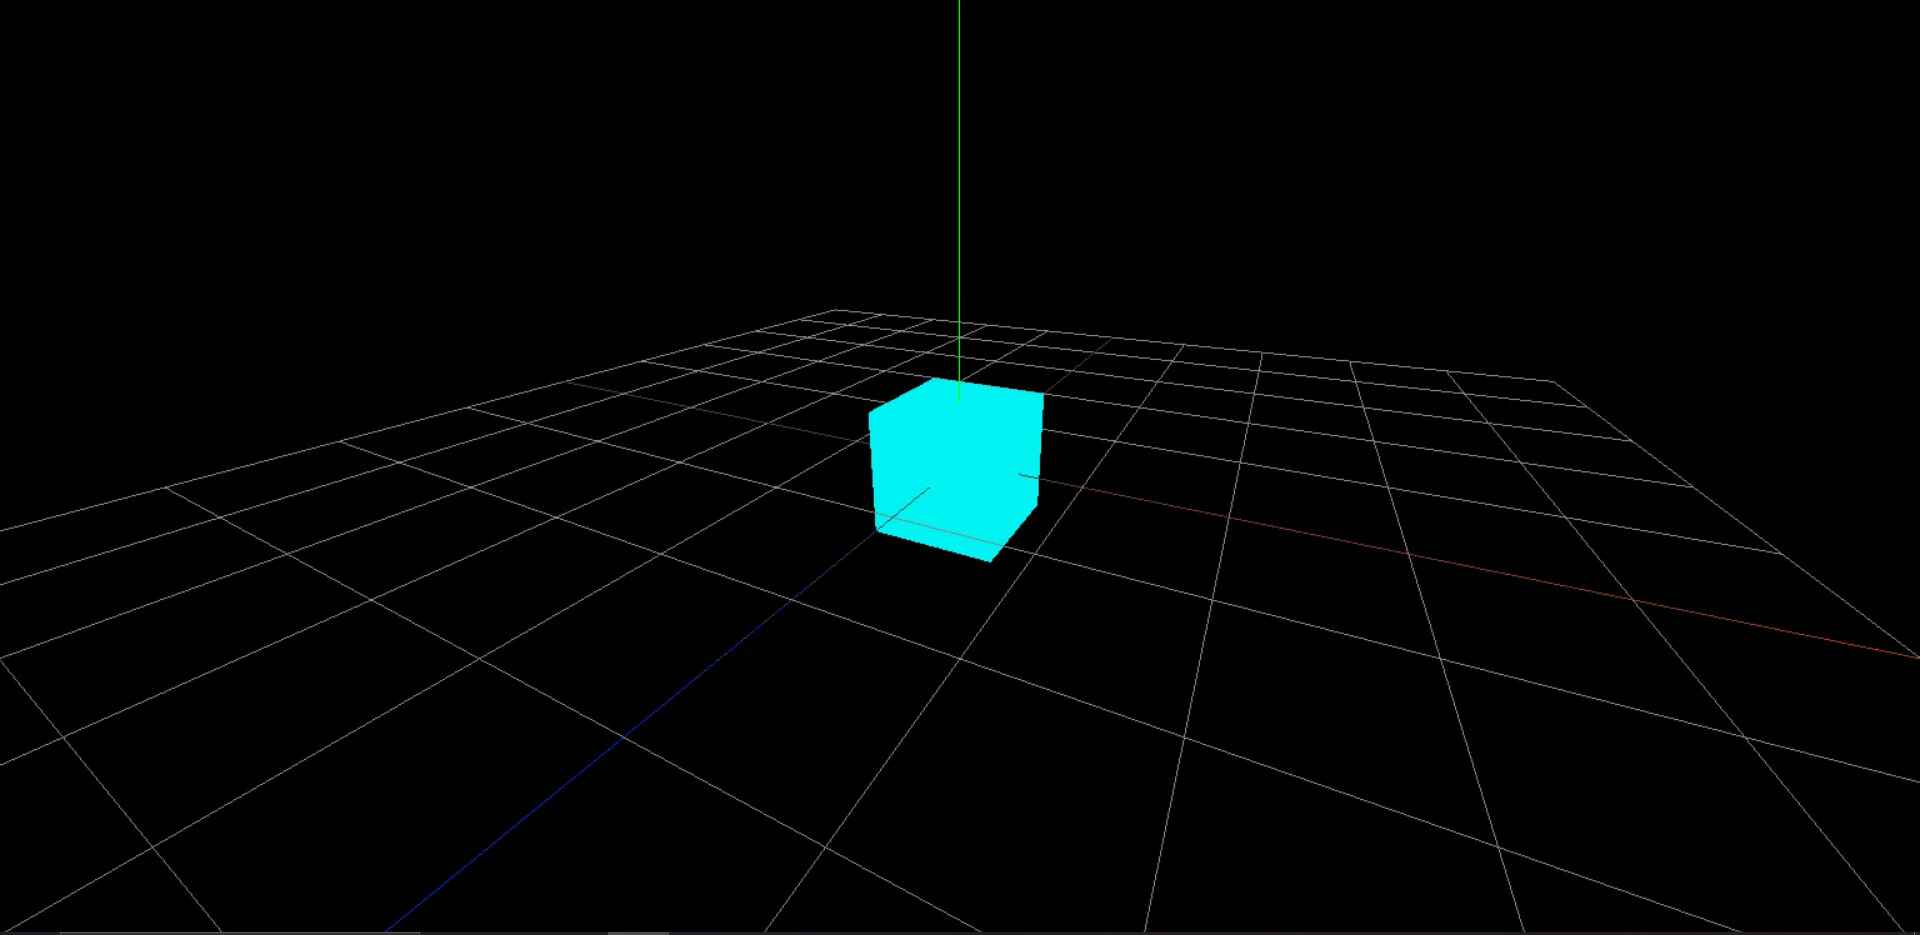
Helpers in Three.js are invaluable tools when it comes to debugging or understanding the position and orientation of various elements in your 3D scene. Let's discuss how to use some of the common helpers such as GridHelper and AxesHelper.
Grid Helper
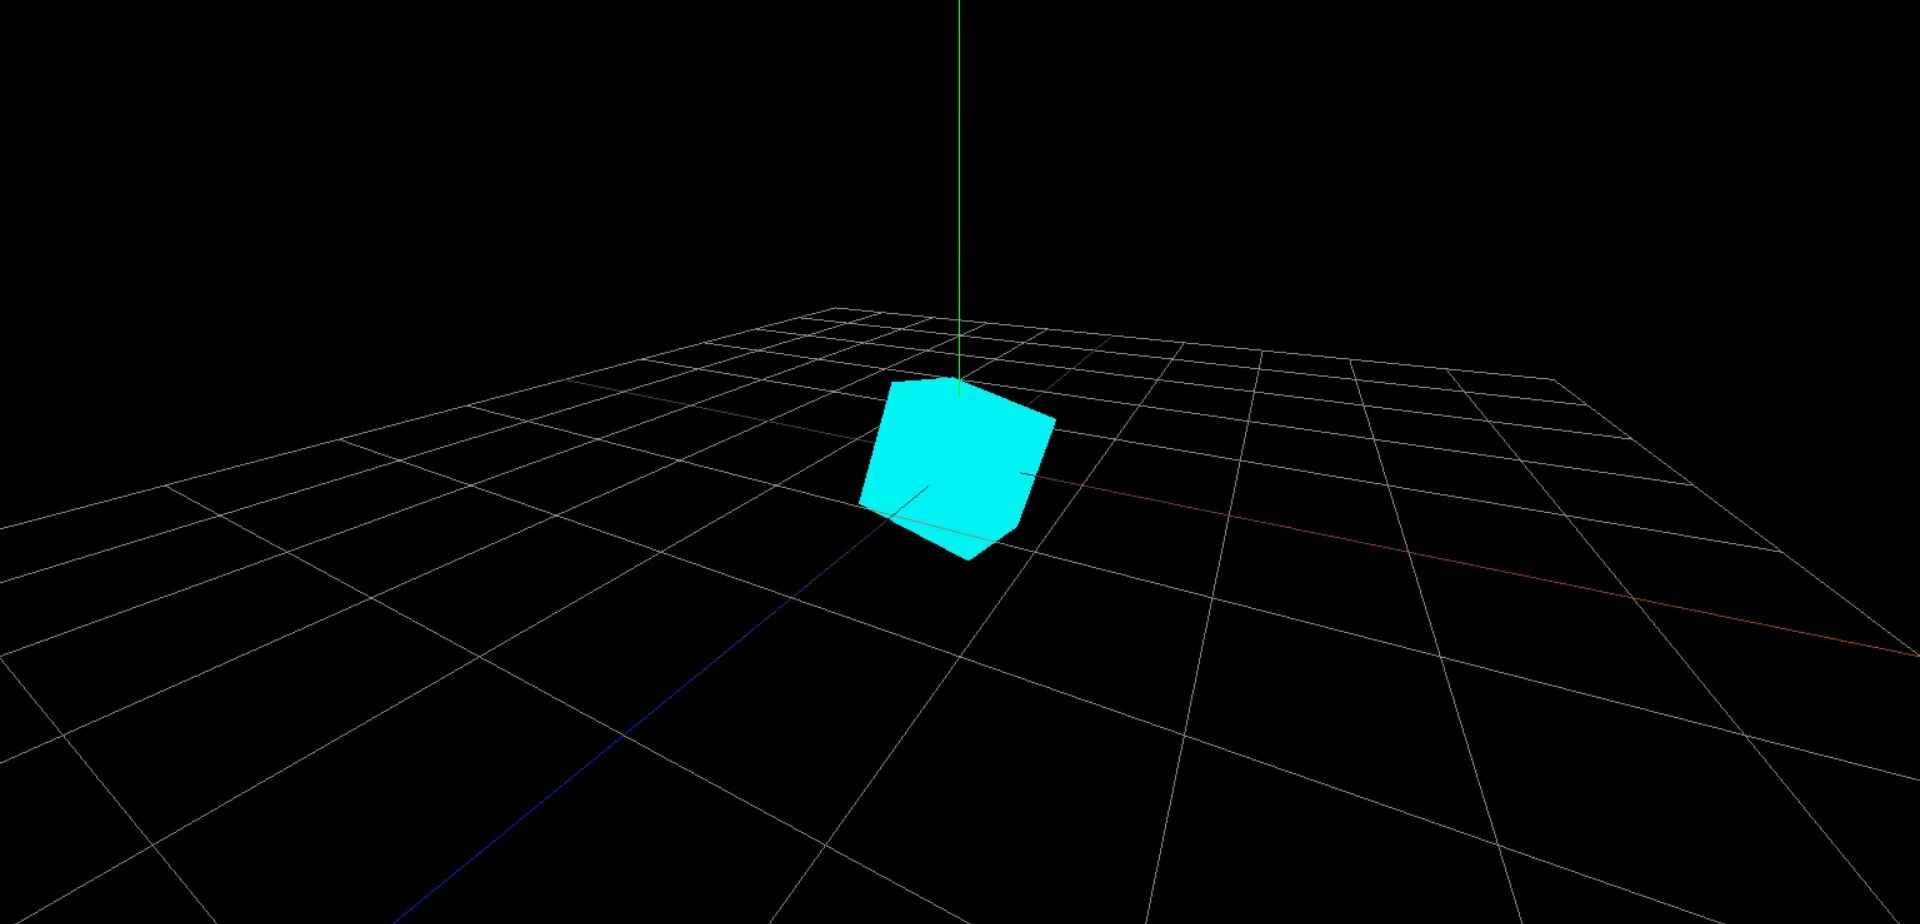
The GridHelper is a great tool for visualizing the dimensions in your scene. It generates a grid in the XZ plane, which can be useful to align your objects.
js// Create a grid helper with size 10 and divisions 10 let gridHelper = new THREE.GridHelper(10, 10); // Add the grid helper to the scene scene.add(gridHelper);
Axes Helper
The AxesHelper is another useful tool that visually represents the coordinate axes in the form of arrows. It helps in understanding the orientation of the objects in the scene.
js// Create an axes helper with size 5 let axesHelper = new THREE.AxesHelper(5); // Add the axes helper to the scene scene.add(axesHelper);
Orbit Controls
The OrbitControls helper is a great tool for adding mouse controls to your scene. It allows you to rotate, pan, and zoom the camera using the mouse. Let's see how to use it.
js// Import the OrbitControls helper import { OrbitControls } from 'three/examples/jsm/controls/OrbitControls.js'; // Create an instance of OrbitControls let controls = new OrbitControls(camera, renderer.domElement); controls.target.set(0, 0, 0); controls.update();
Full Code
Check below how the full code will look like:
jsimport './style.css' import * as THREE from 'three'; // Import the OrbitControls helper import { OrbitControls } from 'three/examples/jsm/controls/OrbitControls.js'; // Initialize Three.js const scene = new THREE.Scene(); const camera = new THREE.PerspectiveCamera(75, window.innerWidth / window.innerHeight, 0.1, 1000); camera.position.set(2, 2, 4); camera.lookAt(0, 0, 0); const renderer = new THREE.WebGLRenderer(); renderer.setSize(window.innerWidth, window.innerHeight); document.body.appendChild(renderer.domElement); // Create a geometry let geometry = new THREE.BoxGeometry(1, 1, 1); // Create a material let material = new THREE.MeshBasicMaterial({ color: 0xf2f2 }); // Create a mesh let cube = new THREE.Mesh(geometry, material); // Add the cube to the scene scene.add(cube); // Create an ambient light let ambientLight = new THREE.AmbientLight(0xfffff, 5); // Add the light to the scene scene.add(ambientLight); // Create a grid helper with size 10 and divisions 10 let gridHelper = new THREE.GridHelper(10, 10); // Add the grid helper to the scene scene.add(gridHelper); // Create an axes helper with size 5 let axesHelper = new THREE.AxesHelper(5); // Add the axes helper to the scene scene.add(axesHelper); // Create an instance of OrbitControls let controls = new OrbitControls(camera, renderer.domElement); controls.target.set(0, 0, 0); controls.update(); // Render the scene renderer.render(scene, camera);
Conclusion
In this blog, we discussed the use of helpers in Three.js to aid in debugging and better understanding our 3D scene. These helpers provide a visual context that can greatly speed up your workflow and development process. By incorporating these tools, you can ensure your scene is set up correctly and avoid any positioning or orientation issues.
Follow and Support me on Medium and Patreon. Clap and Comment on Medium Posts if you find this helpful for you. Thanks for reading it!!!

