How to Play a .mp3 File in JavaScript
JavaScript continually surprises us with its versatility. One exciting feature is the ability to play audio files, such as .mp3. Whether you’re developing a game, creating an interactive website, or simply experimenting, incorporating audio can greatly enhance your project's personality.
Let’s dive into multiple ways How to play a .mp3 file using JavaScript, explore their use cases, and more deeper look on Audio object.
Why Should You Play Audio in JavaScript?
Adding audio to your application can really enhance its interactivity and make it feel more engaging! Here are some fun scenarios where this feature could be super handy:
- Games: Imagine you’re creating a web-based game. You’ll want sound effects like gunshots or explosions and maybe some background music.
- Interactive Websites: Think of fun hover effects, notifications, or button clicks accompanied by a small sound.
- Educational Tools: Teaching pronunciation? A simple button that plays audio can make all the difference.
Now, let’s talk implementation, including different methods you can use to play a .mp3 file in JavaScript.
Different Ways to play .mp3 File:
When it comes to playing a .mp3 file in JavaScript, there are multiple methods you can use based on the level of control and functionality you need. Let’s explore the various options:
1. Using the Audio Object:
The simplest and quickest way to play an audio file is by creating an instance of the Audio object and calling the play() method:
jsconst audio = new Audio('path-to-your-file.mp3'); audio.play();
This method is ideal for straightforward scenarios where you don’t need extensive control over the audio.
2. Embedding the audio Element:
HTML provides a built-in audio element that comes with native controls for playback. Here’s how you can use it:
js<audio controls> <source src="path-to-your-file.mp3" type="audio/mpeg"> Your browser does not support the audio element. </audio>
You can enhance this approach by manipulating the element dynamically using JavaScript:
jsconst audioElement = document.querySelector('audio'); audioElement.play();
3. Using the Web Audio API:
For advanced use cases, such as creating audio effects or visualizations, the Web Audio API provides robust tools. Here’s a basic example:
jsconst audioContext = new (window.AudioContext || window.webkitAudioContext)(); fetch('path-to-your-file.mp3') .then(response => response.arrayBuffer()) .then(data => audioContext.decodeAudioData(data)) .then(buffer => { const source = audioContext.createBufferSource(); source.buffer = buffer; source.connect(audioContext.destination); source.start(0); });
This method is perfect for creating custom audio controls, applying filters, or building immersive audio experiences like games or VR environments.
4. Using Third-Party Libraries:
Libraries like Howler.js abstract much of the complexity of working with audio. Howler.js is an audio library for the modern web. It defaults to Web Audio API and falls back to HTML5 Audio. This makes working with audio in JavaScript easy and reliable across all platforms. Here’s an example:
In the browser:
html<script src="/path/to/howler.js"></script> <script> var sound = new Howl({ src: ['sound.webm', 'sound.mp3'] }); </script>
As a dependency:
jsimport { Howl, Howler } from 'howler';
jsconst { Howl, Howler } = require('howler');
Third-party libraries can simplify implementation, offering features like cross-browser compatibility and advanced controls.
A Closer Look at the Audio Object
The Audio object in JavaScript is a built-in interface that allows developers to work with audio files programmatically. It provides several properties and methods to control audio playback effectively. Here’s a detailed breakdown:
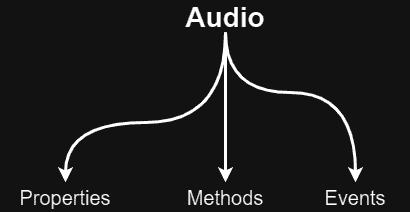
1. Properties:
The Properties of the Audio object are used to set and retrieve information about the audio file, such as its source, current playback time, and volume. These properties allow developers to customize audio behavior and interact with it during playback.
src:
Sets or retrieves the source file for the audio.
jsaudio.src = 'file.mp3';
volume:
Controls the volume from 0.0 (silent) to 1.0 (full volume).
jsaudio.volume = 0.7; // Set volume to 70%
currentTime:
Specifies the current playback position in seconds. Useful for seeking.
jsaudio.currentTime = 30; // Jump to 30 seconds
duration:
Returns the length of the audio file in seconds.
jsconsole.log(audio.duration);
loop:
A boolean that determines if the audio should loop when it ends.
jsaudio.loop = true;
muted:
A boolean that indicates whether the audio is muted.
jsaudio.muted = true; // Mute the audio
paused:
A read-only property that tells whether the audio is currently paused.
jsconsole.log(audio.paused);
playbackRate:
Sets or gets the playback speed of the audio. A value of 1.0 is normal speed.
jsaudio.playbackRate = 1.5; // Play at 1.5x speed
readyState:
Returns the readiness state of the audio, which indicates how much of the media is ready to play.
jsconsole.log(audio.readyState);
autoplay:
A boolean that specifies whether the audio should start playing as soon as it is loaded.
jsaudio.autoplay = true;
preload:
Indicates whether the audio should be preloaded and to what extent.
jsaudio.preload = 'auto'; // Options: 'none', 'metadata', 'auto'
2. Methods:
The Methods of the Audio object provide various ways to interact with audio playback. They can be used to control playback, pause, load, or add event listeners.
play():
Starts or resumes playback of the audio.
jsaudio.play();
pause():
Pauses the audio without resetting the position.
jsaudio.pause();
load():
Reloads the audio file.
jsaudio.load();
addEventListener():
Attaches event listeners for audio events like ended, play, or pause.
jsaudio.addEventListener('ended', () => console.log('Audio finished playing'));
3. Events:
The Events related to the Audio object are useful for monitoring and responding to different stages of playback. They help developers track audio status, handle errors, and update the UI in response to user interactions.
play:
Fired when the audio starts playing. This can be useful for triggering animations or UI updates to indicate that playback has begun.
jsaudio.addEventListener('play', () => { console.log('Audio is playing'); });
pause:
Triggered when the audio is paused. Often used to save the current playback position or update UI elements like play/pause buttons.
jsaudio.addEventListener('pause', () => { console.log('Audio is paused'); });
ended:
Fires when the audio has finished playing. Useful for looping tracks or triggering an action after playback ends.
jsaudio.addEventListener('ended', () => { console.log('Playback finished'); });
timeupdate:
Fired periodically as the playback position changes, ideal for updating progress bars or displaying elapsed time.
jsaudio.addEventListener('timeupdate', () => { const progress = (audio.currentTime / audio.duration) * 100; console.log(`Playback Progress: ${progress}%`); });
volumechange:
Triggered when the volume or mute state changes, enabling dynamic volume indicators.
jsaudio.addEventListener('volumechange', () => { console.log(`Volume: ${audio.volume}, Muted: ${audio.muted}`); });
loadeddata:
Fired when enough data is loaded to begin playback. Useful for preloading indicators.
jsaudio.addEventListener('loadeddata', () => { console.log('Audio data loaded and ready to play'); });
error:
Fires when an error occurs during audio playback or loading, allowing for debugging and fallback mechanisms.
jsaudio.addEventListener('error', () => { console.error('An error occurred while loading or playing the audio'); });
These events give developers comprehensive control over audio playback and user interaction, making the Audio object a versatile tool for building dynamic web applications.
Realtime Example:
Let’s say you’re building a music player for a web application. Imagine you have a list of songs, and you want to allow users to play them on demand. Here’s how you could achieve this using JavaScript:
jsconst songs = ['song1.mp3', 'song2.mp3', 'song3.mp3']; const audio = new Audio(); function playSong(index) { if (index >= 0 && index < songs.length) { audio.src = songs[index]; audio.play(); console.log(`Now playing: ${songs[index]}`); } else { console.log('Invalid song index.'); } } playSong(0); // Plays the first song
In this example, you dynamically set the src property of the Audio object based on user interaction or a specific selection. It’s a practical way to let users pick a track from a playlist and enjoy seamless playback.
Conclusion
Playing .mp3 files is just the beginning of what you can do with audio in JavaScript. Dive into the robust features offered by the Audio object, the Web Audio API, and other tools to create immersive audio experiences. Enhance your projects with rich soundscapes, interactive audio controls, and more. The possibilities are virtually endless with tools like Howler.js and the Web Audio API. Start experimenting today—your next project just might sound amazing!
Follow and Support me on Medium and Patreon. Clap and Comment on Medium Posts if you find this helpful for you. Thanks for reading it!!!


